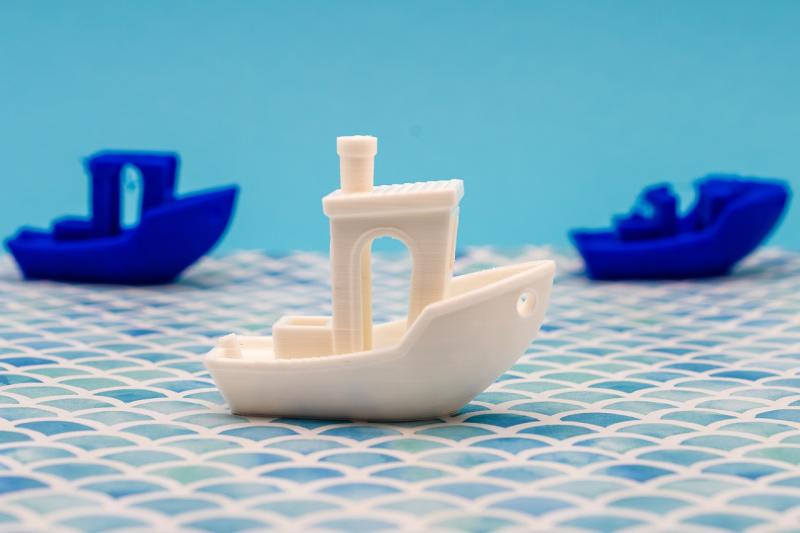
When diving into the world of 3D printing, you'll quickly discover that not all resins are created equal. Each type has its own unique properties and benefits, making them suitable for different projects. Let’s break down some of the most common types of 3D resin you'll come across.
Standard Resin: This is the go-to choice for most beginners. Standard resin is great for general printing needs. It’s easy to work with and produces smooth, detailed prints with good surface quality. If you're just starting out or looking to create prototypes, this is a solid option.
Flexible Resin: If you need parts that can bend and flex, this resin is your best friend. It’s perfect for creating items like phone cases or toys that require a bit of give. While it might not be as strong as other options, its flexibility makes it ideal for certain applications.
Durable Resin: For projects that need to withstand daily wear and tear, durable resin is a smart pick. It’s more robust than standard resin, making it suitable for functional parts or models that you'll handle frequently. Think of it as a tough little workhorse for your 3D prints.
Castable Resin: If you're into jewelry making or need to create detailed patterns for casting, castable resin is a must. This type is designed to burn out cleanly, leaving behind an excellent mold. It allows for high precision, giving you fine details and smooth surfaces that are perfect for casting metals or other materials.
Choosing the Right Resin for Your Project
First off, think about what you’re creating. If you want something strong and durable, you might want to go for a tough resin. These are great for functional parts or models that need to withstand some wear and tear. On the other hand, if you're focusing on detail and aesthetics, a standard resin will do. This type is perfect for prints where fine details matter, like miniatures or intricate designs.
Then there's the matter of curing times. Some resins cure super fast, which can be a serious plus if you’re in a hurry to finish your project. Others might take a bit longer but often provide better detail and strength. Just keep in mind how much time you’re working with, and choose a resin that fits your schedule.
Finally, don't forget about the color and visual finish! There are tons of color options and even some that glow in the dark! If your project needs a unique look, it’s worth exploring the different finishes available. Some resins can even be painted for that extra touch!
Top Tips for Working with 3D Resin
Working with 3D resin can be a fun and creative process, but there are a few tips that can make your experience smoother and more enjoyable. Whether you're a beginner or have dabbled a bit before, these practical tips can help you get the best out of your resin projects.
First and foremost, always wear gloves and work in a well-ventilated area. Resin can be messy and dealing with it requires some precautions. A good pair of nitrile gloves will keep your hands clean and protect you from any irritation. Opening windows or using a fan can help with ventilation, making your workspace safer.
Next, make sure you measure your resin and hardener accurately. Most resins require a specific ratio, and getting this wrong can lead to sticky finishes or failed prints. Use a digital scale if possible, as this will give you the best accuracy. Take your time and double-check your measurements before mixing.
When it comes to mixing, stir slowly and thoroughly. Pour the resin and hardener into a cup and mix gently for at least two minutes. Scrape the sides and bottom of the cup, ensuring that everything is blended well. This step is crucial, as properly mixed resin will cure better and result in a stronger final product.
Lastly, don’t rush the curing process. Allow your pieces to cure for the recommended time before handling them. This patience pays off with a cleaner finish and more durable results. And remember, if you’re trying new colors or types of resin, do a small test print first to avoid any surprises!
Common Mistakes to Avoid with Resin
When diving into the world of 3D resin, it’s easy to get caught up in the excitement and make some common mistakes. Here’s a quick rundown to help you navigate smoothly and get the most out of your resin projects.
First off, not mixing your resin properly can lead to all sorts of issues. Make sure to follow the instructions carefully. Spend a few extra minutes stirring until you see that clear consistency. Uneven mixing can result in a sticky finish or parts that just won’t cure. Don’t rush this step—it’s worth it!
Another pitfall is pouring the resin too quickly. If you pour it in a big stream, you might create bubbles that ruin your final piece. Try to pour slowly, and let gravity do its magic. If bubbles do pop up, using a heat gun or a torch can help to eliminate them. Just keep it moving to avoid burning the resin.
Don’t forget about safety! Always work in a well-ventilated area and wear gloves. Resin can be fun, but it can also be a bit messy and potentially harmful. Protect yourself so you can enjoy your projects without worries.
Lastly, don’t skip the curing time. Each resin has its own ideal curing duration. Rushing this process might make your pieces fragile. Set a reminder to be patient, and let those creations fully cure before handling them. You’ll be glad you waited!